Introduction
Taking screenshots on an HP laptop is a useful skill for anyone working with digital content. Whether you’re trying to capture important information for work, save an interesting moment, or troubleshoot technical issues, knowing how to take a screenshot can save time and effort. In this article, we will cover various methods for taking screenshots on your HP laptop, from basic keyboard shortcuts to more advanced tools, and offer troubleshooting tips to resolve any issues you might face.
By the end of this guide, you’ll be well-equipped to capture, edit, and share screenshots with ease. Let’s get started!
Using the Print Screen (PrtSc) Key
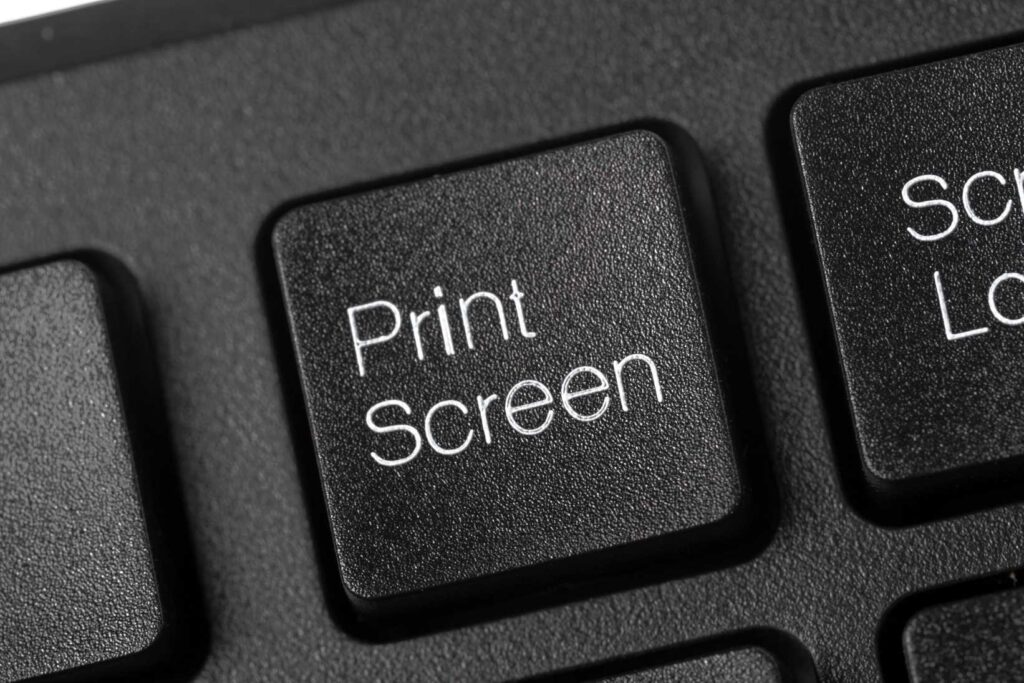
The Print Screen key, commonly labeled as “PrtSc” on your keyboard, is one of the easiest and most commonly used methods to capture your screen. This simple key is often found on the upper-right side of your HP laptop’s keyboard.
- Full-Screen Capture: Press the PrtSc key once to capture an image of your entire screen. The screenshot will be copied to your clipboard, and you can paste it into any image-editing tool, such as Paint or Microsoft Word, using Ctrl + V.
- Active Window Capture: If you only want to capture the window you’re actively using, press Alt + PrtSc. This will capture only the active window on your screen, excluding everything else.
- Save Screenshot Directly: Press Windows + PrtSc to automatically save the screenshot as a PNG file in your Pictures library under the Screenshots folder. This method is efficient and doesn’t require pasting the screenshot into an image editor.
Windows + Print Screen Shortcut
The Windows + PrtSc keyboard shortcut offers a fast way to save a screenshot without the need for any additional tools. Here’s how it works:
- How It Works: When you press Windows + PrtSc, the screen will briefly dim, indicating that a screenshot has been taken. The screenshot will go straight to the Screenshots folder in your Pictures library.
- Why It’s Useful: This method is particularly handy for users who take multiple screenshots and want them automatically saved without the need for extra steps.
Using Snip & Sketch
Windows 10 and Windows 11 offer a built-in tool called Snip & Sketch, which allows you to take screenshots with more flexibility than the traditional PrtSc key.
- How to Access Snip & Sketch: To use Snip & Sketch, press Windows + Shift + S. Your screen will get darker, and a small toolbar will show up at the top with these choices:
- Rectangular Snip: Drag to capture a rectangular portion of your screen.
- Freeform Snip: Make a shape around the area you want to capture.
- Window Snip: Click to capture a specific window.
- Full-Screen Snip: Capture the entire screen.
- Editing and Saving: Once you capture the screenshot, the image is copied to your clipboard. A notification will appear, and you can click on it to open the screenshot in the Snip & Sketch app. You can then annotate, crop, and save the image.
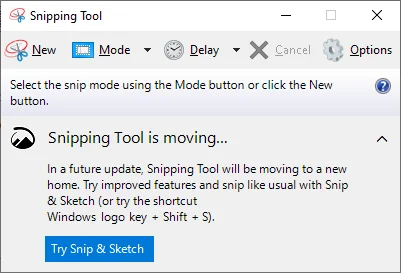
Using the Snipping Tool
The Snipping Tool is another built-in Windows tool that offers several capture modes. It’s available on all Windows versions, though it’s being phased out in favor of Snip & Sketch in Windows 11.
- How to Open Snipping Tool: Search for Snipping Tool in the Start menu. Once opened, you can use the tool’s options to capture a screenshot in various ways:
- Freeform Snip: To capture an area, draw a freeform shape around it.
- Rectangular Snip: Select a rectangular area by clicking and dragging your mouse.
- Window Snip: Click on the window you want to take a picture of.
- Full-Screen Snip: Capture everything on your screen.
- Saving and Editing: After taking the screenshot, the image will open in the Snipping Tool window, where you can annotate, highlight, and save it.
Using the Camera App for Screenshots
While not typically used for screenshots, the Camera App on your HP laptop can be a quick alternative when you want to capture your screen.
- How to Use the Camera App: Open the Camera app by searching for it in the Start menu. Once the camera view is open, you can click the camera icon to take a snapshot of your screen.
- Saving the Screenshot: The image will automatically be saved in the Camera Roll folder, which can be accessed through your Pictures library.
Third-Party Screenshot Tools
If you need additional features, such as scrolling captures or advanced editing, third-party tools can offer greater functionality. Some of the most popular tools include:
- Snagit: Snagit is a paid tool known for its advanced editing and screen capture features. It lets you easily take screenshots, record videos of your screen, and edit your screenshots.
- Greenshot: Greenshot is an open-source, free tool that allows users to capture screenshots, edit them, and export them to various formats. It also includes built-in annotation features.
- ShareX: ShareX is another free and open-source tool that offers powerful screenshot, screen recording, and sharing capabilities.
- Lightshot: Lightshot is a lightweight and simple screenshot tool that allows you to quickly capture a selected area and upload it to the cloud for easy sharing.
How to Edit and Save Screenshots
After taking a screenshot on your HP laptop, it’s important to know how to edit and save it effectively:
- Paste into an Image Editor: If you’ve used the Print Screen key or Windows + PrtSc, paste the screenshot into an image editor like Paint by pressing Ctrl + V. Then you can crop, add notes, and save it.
- Edit in Snip & Sketch or Snipping Tool: Both Snip & Sketch and the Snipping Tool allow you to edit screenshots directly after capturing them. These tools offer basic editing features such as cropping, highlighting, and adding text.
- Save the Screenshot: After editing, save the screenshot in your desired file format (e.g., PNG, JPEG). Ensure that you organize your screenshots in an easily accessible folder for future use.
Troubleshooting Common Screenshot Issues
If you’re encountering issues while trying to take screenshots on your HP laptop, consider the following troubleshooting tips:
- PrtSc Key Not Working: If the PrtSc key isn’t working, ensure that your keyboard drivers are up to date. You can update them through Device Manager or by visiting HP’s official website for the latest drivers.
- Screenshots Not Saving: If your screenshots are not saving, check the folder where they should be saved (usually Pictures > Screenshots). Check to see if the folder has been moved or deleted.
Blurry Screenshots: If your screenshots appear blurry, ensure your screen resolution is set to its optimal settings. You can adjust this by right-clicking on your desktop and selecting Display Settings.